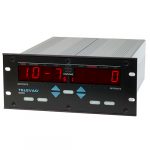
Description
This application note explains the process for resetting the MM200 data memory from a Windows PC. The serial communications program Tera Term must be installed prior to following these instructions, and a serial to USB converter must be purchased. Note that this will reset all configurable features of the MM200, such as analog output and set point settings. If you don’t have Tera Term installed, click here to install the latest version from GitHub.
Instructions
1. Plug the serial to USB converter into your PC.
2. Open the Start Menu.
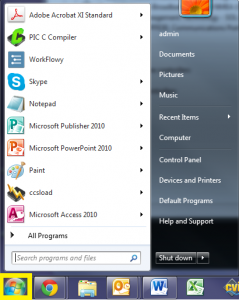
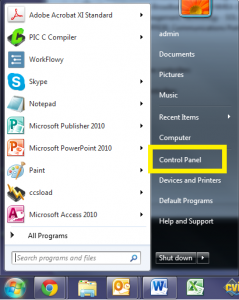
3. Open the Control Panel.
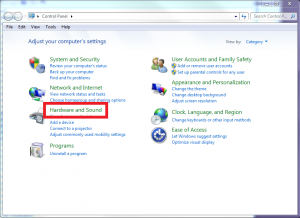
4. Open the Hardware and Sound.
5. Open the Device Manager.
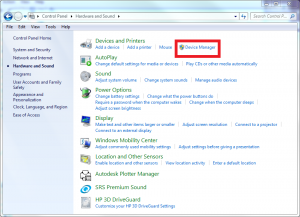
6. Expand the Ports (COM & LPT) drop down.
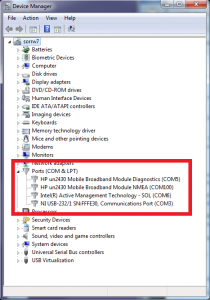
7. Determine the COM port assignment for your USB to serial converter, in this example the converter is assigned to COM3.
8. Open TeraTerm.
9. Open the Setup menu and select the Serial port… option.
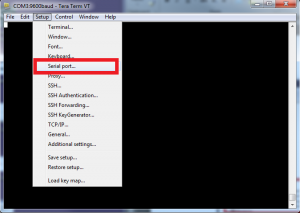
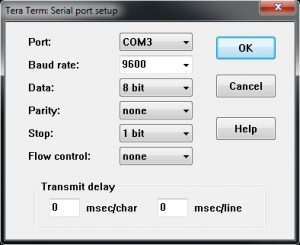
10. Change the Port setting to the COM port for your USB to serial converter, in this example it is COM3.
11. Ensure that the remainder of the settings are the following, then select OK:
- Baud rate: 9600
- Data: 8 bit
- Parity: none
- Stop: 1 bit
- Flow control: none
- Transmit delay: 0 msec/char, 0 msec/line
12. Open the Setup menu and select the Terminal setup… option.
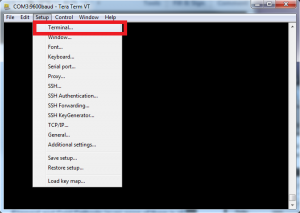
13. Ensure that the settings are the following, then select OK:
- Receive: CR+LF
- Transmit: CR+LF
- Local echo checked
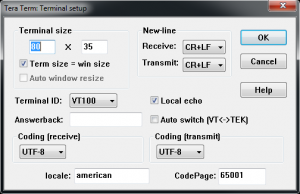
14. Send the following commands (<CR> is equivalent to pressing the Enter key):
- D1<CR>
- CF<CR>
- PF<CR>
- BF<CR>
- CA3<CR>
- SE<CR>
15. The memory has been reset and the MM200 should be functional. If you are still experiencing issues, start a online chat with us, or contact our Technical Support Team.
Related Products
• Customer configurable design
• RS-232/RS-485 digital communications
• Supports up to 8 relay set points
• Selectable units of measurement


